Hology
Hology 文檔
Hology 文檔
  • 👋歡迎來到Hology文檔
  • Getting started
    • Hology Engine簡介
    • 第一步指南
    • 編輯器基礎指南
      • 在場景中飛行
      • 放置物件
      • 選擇物件
      • 變換
      • 分組物件
      • 複製
    • 入門遊戲模板 - 第三人稱射擊遊戲
  • Tutorials
    • 滾球 - 遊戲玩法編程
    • 角色動畫程式設計
    • Character AI behavior
  • Release
    • 遊戲發行
      • Discord Activities
      • 臉書即時遊戲
      • 上傳至 Itch.io
      • 使用 GitHub Pages
      • 發布到Steam
      • iOS 和 Android
  • Assets
    • 3D模型
      • 客製化碰撞形狀
      • 材質自訂分配
    • 材質
    • 紋理
    • 預製體
  • Gameplay
    • 演員(Actors)
      • 創建演員類
      • 演員參數
      • Actor 元件
      • Actor 的生命週期
      • 生成 Actors
      • 移動 Actors
    • 服務
      • 載入資產
    • Player input
    • Collision detection
    • Physics
      • Physics body types
      • Applying forces
      • Ray casting
    • Trigger volumes
    • Character movement
    • Pointer events
    • Animation
      • Animation system
      • Character Animation
      • Animation State Machine
    • Sound
      • Audio parameter
    • 世界
    • Navigation
  • Shaders
    • 著色器介紹
    • Creating shaders
    • 著色器參數
    • Typescript shaders
      • Types
      • Math functions
      • Attributes
      • Varying
      • Uniforms
      • Textures
      • Arrays
      • Select
      • Lighting
    • Painted materials
    • Water shader tutorial
  • Level design
    • 地形雕刻
    • 地形繪製
    • Grass
  • User Interfaces
    • 創建用戶界面UI
    • 使用 React
    • VR
  • Visual Effects
    • 視覺效果簡介
    • 視覺特效資產
  • Integrations
    • Arcweave
由 GitBook 提供支持
在本页
  • 設置場景
  • 輸入角色資產
  • 程式設計角色
  • 設置玩家輸入
  • 生成和設置
  • 測試遊戲
  • 總結
  1. Tutorials

角色動畫程式設計

上一页滾球 - 遊戲玩法編程下一页Character AI behavior

最后更新于2个月前

級別:初學者

在本教程中,我們將說明如何設置一個可動的人類角色,包括鍵盤控制和與移動同步的動畫。這類似於 入門遊戲模板 - 第三人稱射擊遊戲,我們將詳細介紹如何設置這些,以便您了解發生的情況以及如何擴展它。

本專案的完整程式碼可以從GitHub複製。

Prerequisites

Before continuing, you need to create a new project and familiarise yourself with the basics of the editor. Go through the article 第一步指南 to learn how to set up a project. Then learn how to navigate in the editor using the articles in 編輯器基礎指南.

While some coding skills are useful, all the code needed will be provided in this tutorial.

設置場景

創建專案/project後,您會有一個可用的空場景。我們將在此場景中創建幾個物件來說明如何製作角色。為了讓我們的角色有可以行走的地方,我們將添加一個地形/landscape。我們還將添加一個生成點角色,以便我們可以從遊戲程式碼在場景中生成可玩角色。

在資產瀏覽器中,選擇「形狀/Shapes」並向下找到「地形/Landscape」項。
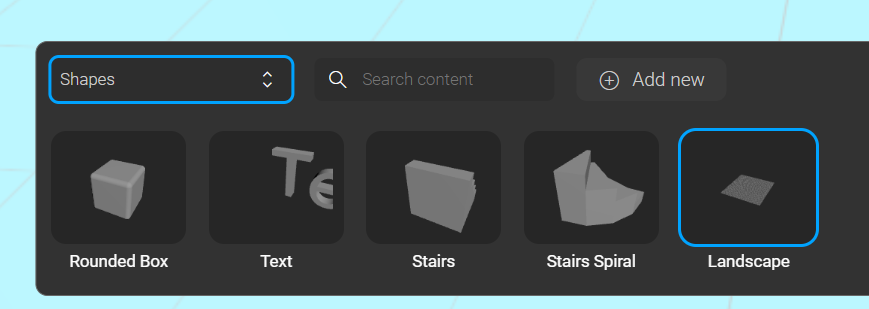
右鍵單擊「地形/landscape」項,然後單擊「添加到場景」。系統將提示您一些創建地形的選項。對於本教程,您可以保留預設設置,然後單擊「創建/create」。您也可以按住滑鼠左鍵將項目拖曳到場景中

接下來,我們需要創建一個生成點/Spawn point。在資產瀏覽器中,選擇「角色/Actors」,然後右鍵單擊「生成點/Spawn Point」並將其添加到場景中。單擊您之前創建的地形上的任意位置以放置生成點。

輸入角色資產

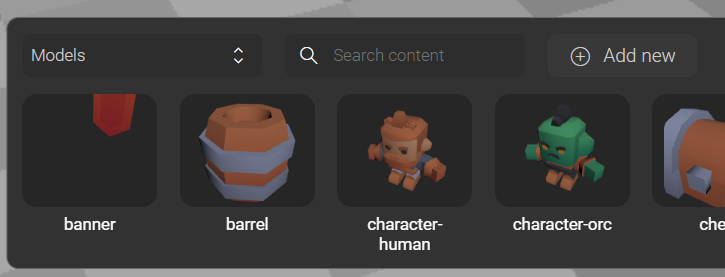
我們需要一個具有動畫的角色3D模型。對於本教程,我們將使用Kenney製作的資產包中的角色。

下載資產包後,解壓文件,找到其中一個角色模型,如Models/GLB format/character-human.glb,並將其拖入編輯器以輸入。我們稍後將從遊戲程式碼中引用此資產。
程式設計角色

現在我們將創建一個角色類來表示可用角色。在src/actors/character.ts中創建一個文件。將以下程式碼添加到文件中。


import { Actor, AnimationState, AnimationStateMachine, AssetLoader, BaseActor, ViewController, attach, inject } from "@hology/core/gameplay";
import { CharacterAnimationComponent, CharacterMovementComponent, CharacterMovementMode, ThirdPersonCameraComponent } from "@hology/core/gameplay/actors";

@Actor()
class Character extends BaseActor {
  private animation = attach(CharacterAnimationComponent)
  public readonly movement = attach(CharacterMovementComponent, {
    maxSpeed: 1.5,
    maxSpeedSprint: 4,
    maxSpeedBackwards: 1,
    snapToGround: 0.1,
    autoStepMinWidth: 0,
    autoStepMaxHeight: 0.1,
    fallingReorientation: true,
    fallingMovementControl: 0.2,
    colliderHeight: .4,
    colliderRadius: 0.2,
    jumpVelocity: 3.5
  })
  public readonly thirdPersonCamera = attach(ThirdPersonCameraComponent, {
    height: .7,
    offsetX: -0.3,
    offsetZ: 0.2,
    minDistance: 3,
    maxDistance: 3,
    distance: 3,
    autoActivate: false
  })

  private assetLoader = inject(AssetLoader)
  protected modelName = 'character-human'

  async onInit(): Promise<void> {
    const { scene, animations } = await this.assetLoader.getModelByAssetName(this.modelName)

    this.object.add(scene)

    const clips = Object.fromEntries(animations.map(clip => [clip.name, clip]))
  
    const idle = new AnimationState(clips.idle)
    const walk = new AnimationState(clips.walk)
    const sit = new AnimationState(clips.sit)
    const jump = new AnimationState(clips.jump)
    const sprint = new AnimationState(clips.sprint)

    idle.transitionsBetween(walk, () => this.movement.horizontalSpeed > 0)
    walk.transitionsBetween(sprint, () => this.movement.isSprinting)
    idle.transitionsTo(sit, elapsedTime => elapsedTime > 1)
    sit.transitionsTo(walk, () => this.movement.horizontalSpeed > 0)
  
    for (const state of [idle, walk, sit, sprint]) {
      state.transitionsBetween(jump, () => this.movement.mode === CharacterMovementMode.falling)
    }

    const sm = new AnimationStateMachine(idle)

    this.animation.setup(scene)
    this.animation.playStateMachine(sm)
  }

}

export default Character

首先,我們附加了幾個組件,以快速為我們的角色添加功能。

  • CharacterAnimationComponent 允許我們使用狀態機播放動畫。更多資訊請閱讀此處 Character Animation

  • CharacterMovementComponent 可以接收玩家輸入並以常見模式(如站立、行走、奔跑和跳躍)移動角色。 更多資訊請閱讀此處 Character movement

  • ThirdPersonCameraComponent 將攝像機移動到角色後面。它提供了各種方式來偏移攝像機。

我們使用注入的AssetLoader通過資產名稱(可在編輯器中找到)加載資產。這為我們提供了模型的場景(即角色網格/character mesh)和一系列動畫。

在剩餘的程式碼中,我們設置了動畫狀態機。 閱讀 Animation State Machine 指南以更好地了解它們的原理

設置玩家輸入

為了能夠控制角色的移動,我們將創建一個玩家控制服務器,該控制器接收玩家的輸入並將其轉發到角色的移動組件。

在 src/services/player-controller.ts 創建一個文件,複製及貼上以下程式碼。

import { inject, Service } from "@hology/core/gameplay"
import {
  InputService,
  Keybind,
  Mousebind,
  Wheelbind,
} from "@hology/core/gameplay/input"
import Character from "../actors/character"

enum InputAction {
  moveForward,
  moveBackward,
  moveLeft,
  moveRight,
  jump,
  sprint,
  rotate,
  rotateCamera,
  zoomCamera
}

@Service()
class PlayerController {
  private inputService = inject(InputService)
  private character: Character

  constructor() {
    this.inputService.setKeybind(InputAction.jump, new Keybind(" "))
    this.inputService.setKeybind(InputAction.sprint, new Keybind("Shift"))
    this.inputService.setKeybind(InputAction.moveForward, new Keybind("w"))
    this.inputService.setKeybind(InputAction.moveBackward, new Keybind("s"))
    this.inputService.setKeybind(InputAction.moveLeft, new Keybind("a"))
    this.inputService.setKeybind(InputAction.moveRight, new Keybind("d"))
    this.inputService.setMousebind(
      InputAction.rotate,
      new Mousebind(0.01, true, "x")
    )
    this.inputService.setMousebind(
      InputAction.rotateCamera,
      new Mousebind(0.003, false, "y")
    )
    this.inputService.setWheelbind(
      InputAction.zoomCamera,
      new Wheelbind(0.0003, false)
    )
  }

  public setup(character: Character) {
    this.inputService.stop()
    this.character = character
    this.bindCharacterInput()
    this.inputService.start()
  }

  private bindCharacterInput() {
    const playerMove = this.character.movement.directionInput
    const playerJump = this.character.movement.jumpInput
    const playerSprint = this.character.movement.sprintInput

    this.inputService.bindToggle(InputAction.jump, playerJump.toggle)
    this.inputService.bindToggle(InputAction.sprint, playerSprint.toggle)
    this.inputService.bindToggle(InputAction.moveForward, playerMove.togglePositiveY)
    this.inputService.bindToggle(InputAction.moveBackward, playerMove.toggleNegativeY)
    this.inputService.bindToggle(InputAction.moveLeft, playerMove.toggleNegativeX)
    this.inputService.bindToggle(InputAction.moveRight, playerMove.togglePositiveX)
    this.inputService.bindDelta(
      InputAction.rotate,
      this.character.movement.rotationInput.rotateY
    )
    this.inputService.bindDelta(
      InputAction.rotateCamera,
      this.character.thirdPersonCamera.rotationInput.rotateX
    )
    this.inputService.bindDelta(
      InputAction.zoomCamera,
      this.character.thirdPersonCamera.zoomInput.increment
    )

  }
}

export default PlayerController

此程式碼使用 InputService。要更好地了解其工作原理,請閱讀 Player input 指南。

生成和設置

現在我們只需要生成角色並設置玩家控制器,這可以從src/services/game.ts中的遊戲類完成。複製及貼上以下程式碼。換此文件的內容。


import { GameInstance, Service, World, inject } from '@hology/core/gameplay';
import { SpawnPoint } from '@hology/core/gameplay/actors';
import Character from '../actors/character';
import PlayerController from './player-controller';

@Service()
class Game extends GameInstance {
  private world = inject(World)
  private playerController = inject(PlayerController)

  async onStart() {
    const spawnPoint = this.world.findActorByType(SpawnPoint)
    const character = await spawnPoint.spawnActor(Character)
    character.thirdPersonCamera.activate()
    this.playerController.setup(character)
  }
}

export default Game

在此程式碼中,我們在onStart函數中執行幾個操作,該函數在遊戲加載完畢並準備開始時被調用。

  1. 我們在世界中查找生成點角色。

  2. 使用生成點和之前創建的Character角色類生成角色,以獲得一個新角色,該角色放置在場景中,具有生成點的位置和旋轉。

  3. 使用角色調用玩家控制器的setup function函數,將輸入事件綁定到此角色的移動組件。

這就是擁有一個可玩角色和動畫所需的全部內容。

測試遊戲

在terminal中運行以下命令來運行遊戲
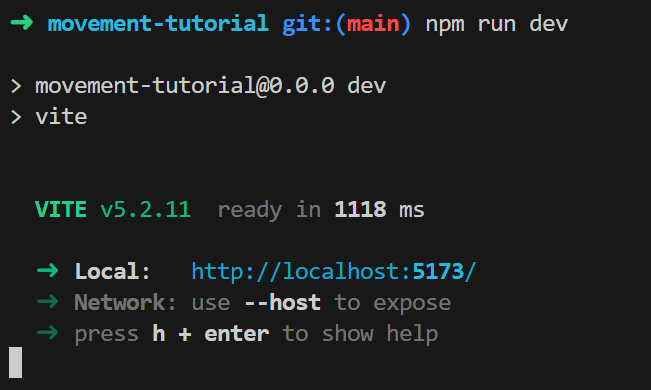
npm run dev

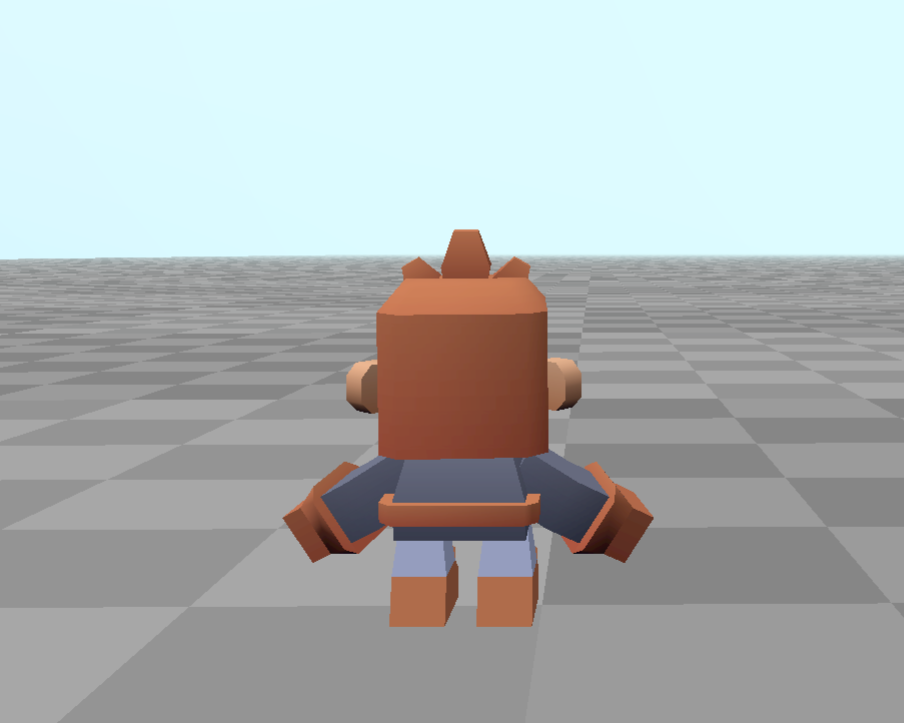
您現在應該看到遊戲運行,如教程開頭的圖片所示。嘗試按鍵盤上的W、A、S、D。首先用滑鼠單擊場景中的某個位置,以便通過移動滑鼠來旋轉角色和攝像機。

總結

您現在有了一個可能成為有趣遊戲的起點。

  • 通過以下連結閱讀有關本教程中涵蓋功能的更多資訊。

  • 通過導入更多資產並將它們放置在場景中來設計更有趣的世界。

  • 創建一個更有趣的遊戲。例如,添加一些遊戲機制 Trigger volumes,可以在你走進去時觸發各種事物,或者放置其他角色,當你靠近並按下按鈕時會做一些事情。

這應該會給您一個連結,如 。您可以在瀏覽器中打開該連結以查看遊戲。

https://github.com/hologyengine/movement-tutorial
http://localhost:5173
LogoMini Dungeon · Kenney