級別: 初學者
在本教程中,我們將說明如何設置一個可動的人類角色,包括鍵盤控制和與移動同步的動畫。這類似於 入門遊戲模板 - 第三人稱射擊遊戲 ,我們將詳細介紹如何設置這些,以便您了解發生的情況以及如何擴展它。
本專案的完整程式碼可以從GitHub複製。
https://github.com/hologyengine/movement-tutorial
Prerequisites
Before continuing, you need to create a new project and familiarise yourself with the basics of the editor. Go through the article 第一步指南 to learn how to set up a project. Then learn how to navigate in the editor using the articles in 編輯器基礎指南 .
While some coding skills are useful, all the code needed will be provided in this tutorial.
設置場景
創建專案/project後,您會有一個可用的空場景。我們將在此場景中創建幾個物件來說明如何製作角色。為了讓我們的角色有可以行走的地方,我們將添加一個地形/landscape。我們還將添加一個生成點角色,以便我們可以從遊戲程式碼在場景中生成可玩角色。
在資產瀏覽器中,選擇「形狀/Shapes」並向下找到「地形/Landscape」項。
右鍵單擊「地形/landscape」項,然後單擊「添加到場景」。系統將提示您一些創建地形的選項。對於本教程,您可以保留預設設置,然後單擊「創建/create」。您也可以按住滑鼠左鍵將項目拖曳到場景中
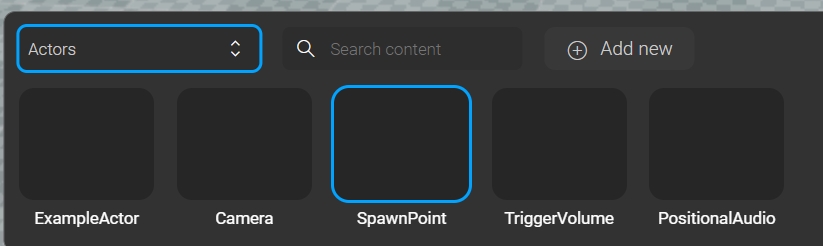
接下來,我們需要創建一個生成點/Spawn point。在資產瀏覽器中,選擇「角色/Actors」,然後右鍵單擊「生成點/Spawn Point」並將其添加到場景中。單擊您之前創建的地形上的任意位置以放置生成點。
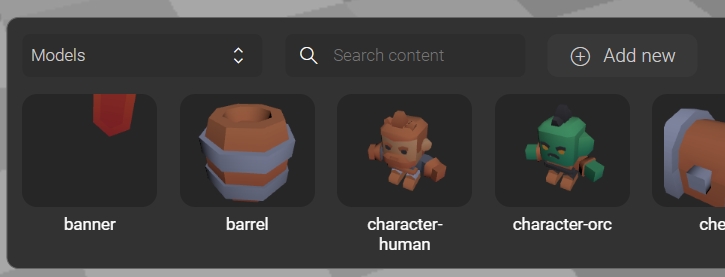
輸入角色資產
我們需要一個具有動畫的角色3D模型。對於本教程,我們將使用Kenney製作的資產包中的角色。
下載資產包後,解壓文件,找到其中一個角色模型,如Models/GLB format/character-human.glb ,並將其拖入編輯器以輸入。我們稍後將從遊戲程式碼中引用此資產。
程式設計角色
現在我們將創建一個角色類來表示可用角色。在src/actors/character.ts中創建一個文件。將以下程式碼添加到文件中。
复制
import { Actor, AnimationState, AnimationStateMachine, AssetLoader, BaseActor, ViewController, attach, inject } from "@hology/core/gameplay";
import { CharacterAnimationComponent, CharacterMovementComponent, CharacterMovementMode, ThirdPersonCameraComponent } from "@hology/core/gameplay/actors";

@Actor()
class Character extends BaseActor {
  private animation = attach(CharacterAnimationComponent)
  public readonly movement = attach(CharacterMovementComponent, {
    maxSpeed: 1.5,
    maxSpeedSprint: 4,
    maxSpeedBackwards: 1,
    snapToGround: 0.1,
    autoStepMinWidth: 0,
    autoStepMaxHeight: 0.1,
    fallingReorientation: true,
    fallingMovementControl: 0.2,
    colliderHeight: .4,
    colliderRadius: 0.2,
    jumpVelocity: 3.5
  })
  public readonly thirdPersonCamera = attach(ThirdPersonCameraComponent, {
    height: .7,
    offsetX: -0.3,
    offsetZ: 0.2,
    minDistance: 3,
    maxDistance: 3,
    distance: 3,
    autoActivate: false
  })

  private assetLoader = inject(AssetLoader)
  protected modelName = 'character-human'

  async onInit(): Promise<void> {
    const { scene, animations } = await this.assetLoader.getModelByAssetName(this.modelName)

    this.object.add(scene)

    const clips = Object.fromEntries(animations.map(clip => [clip.name, clip]))

    const idle = new AnimationState(clips.idle)
    const walk = new AnimationState(clips.walk)
    const sit = new AnimationState(clips.sit)
    const jump = new AnimationState(clips.jump)
    const sprint = new AnimationState(clips.sprint)

    idle.transitionsBetween(walk, () => this.movement.horizontalSpeed > 0)
    walk.transitionsBetween(sprint, () => this.movement.isSprinting)
    idle.transitionsTo(sit, elapsedTime => elapsedTime > 1)
    sit.transitionsTo(walk, () => this.movement.horizontalSpeed > 0)

    for (const state of [idle, walk, sit, sprint]) {
      state.transitionsBetween(jump, () => this.movement.mode === CharacterMovementMode.falling)
    }

    const sm = new AnimationStateMachine(idle)

    this.animation.setup(scene)
    this.animation.playStateMachine(sm)
  }

}

export default Character
首先,我們附加了幾個組件,以快速為我們的角色添加功能。
ThirdPersonCameraComponent 將攝像機移動到角色後面。它提供了各種方式來偏移攝像機。
我們使用注入的AssetLoader通過資產名稱(可在編輯器中找到)加載資產。這為我們提供了模型的場景(即角色網格/character mesh)和一系列動畫。
在剩餘的程式碼中,我們設置了動畫狀態機。 閱讀 Animation State Machine 指南以更好地了解它們的原理
設置玩家輸入
為了能夠控制角色的移動,我們將創建一個玩家控制服務器,該控制器接收玩家的輸入並將其轉發到角色的移動組件。
在 src/services/player-controller.ts 創建一個文件,複製及貼上以下程式碼。
复制 import { inject, Service } from "@hology/core/gameplay"
import {
InputService,
Keybind,
Mousebind,
Wheelbind,
} from "@hology/core/gameplay/input"
import Character from "../actors/character"
enum InputAction {
moveForward,
moveBackward,
moveLeft,
moveRight,
jump,
sprint,
rotate,
rotateCamera,
zoomCamera
}
@Service()
class PlayerController {
private inputService = inject(InputService)
private character: Character
constructor() {
this.inputService.setKeybind(InputAction.jump, new Keybind(" "))
this.inputService.setKeybind(InputAction.sprint, new Keybind("Shift"))
this.inputService.setKeybind(InputAction.moveForward, new Keybind("w"))
this.inputService.setKeybind(InputAction.moveBackward, new Keybind("s"))
this.inputService.setKeybind(InputAction.moveLeft, new Keybind("a"))
this.inputService.setKeybind(InputAction.moveRight, new Keybind("d"))
this.inputService.setMousebind(
InputAction.rotate,
new Mousebind(0.01, true, "x")
)
this.inputService.setMousebind(
InputAction.rotateCamera,
new Mousebind(0.003, false, "y")
)
this.inputService.setWheelbind(
InputAction.zoomCamera,
new Wheelbind(0.0003, false)
)
}
public setup(character: Character) {
this.inputService.stop()
this.character = character
this.bindCharacterInput()
this.inputService.start()
}
private bindCharacterInput() {
const playerMove = this.character.movement.directionInput
const playerJump = this.character.movement.jumpInput
const playerSprint = this.character.movement.sprintInput
this.inputService.bindToggle(InputAction.jump, playerJump.toggle)
this.inputService.bindToggle(InputAction.sprint, playerSprint.toggle)
this.inputService.bindToggle(InputAction.moveForward, playerMove.togglePositiveY)
this.inputService.bindToggle(InputAction.moveBackward, playerMove.toggleNegativeY)
this.inputService.bindToggle(InputAction.moveLeft, playerMove.toggleNegativeX)
this.inputService.bindToggle(InputAction.moveRight, playerMove.togglePositiveX)
this.inputService.bindDelta(
InputAction.rotate,
this.character.movement.rotationInput.rotateY
)
this.inputService.bindDelta(
InputAction.rotateCamera,
this.character.thirdPersonCamera.rotationInput.rotateX
)
this.inputService.bindDelta(
InputAction.zoomCamera,
this.character.thirdPersonCamera.zoomInput.increment
)
}
}
export default PlayerController
此程式碼使用 InputService。要更好地了解其工作原理,請閱讀 Player input 指南。
生成和設置
現在我們只需要生成角色並設置玩家控制器,這可以從src/services/game.ts中的遊戲類完成。複製及貼上以下程式碼。換此文件的內容。
复制
import { GameInstance, Service, World, inject } from '@hology/core/gameplay';
import { SpawnPoint } from '@hology/core/gameplay/actors';
import Character from '../actors/character';
import PlayerController from './player-controller';

@Service()
class Game extends GameInstance {
  private world = inject(World)
  private playerController = inject(PlayerController)

  async onStart() {
    const spawnPoint = this.world.findActorByType(SpawnPoint)
    const character = await spawnPoint.spawnActor(Character)
    character.thirdPersonCamera.activate()
    this.playerController.setup(character)
  }
}

export default Game
在此程式碼中,我們在onStart函數中執行幾個操作,該函數在遊戲加載完畢並準備開始時被調用。
使用生成點和之前創建的Character角色類生成角色,以獲得一個新角色,該角色放置在場景中,具有生成點的位置和旋轉。
使用角色調用玩家控制器的setup function函數,將輸入事件綁定到此角色的移動組件。
這就是擁有一個可玩角色和動畫所需的全部內容。
測試遊戲
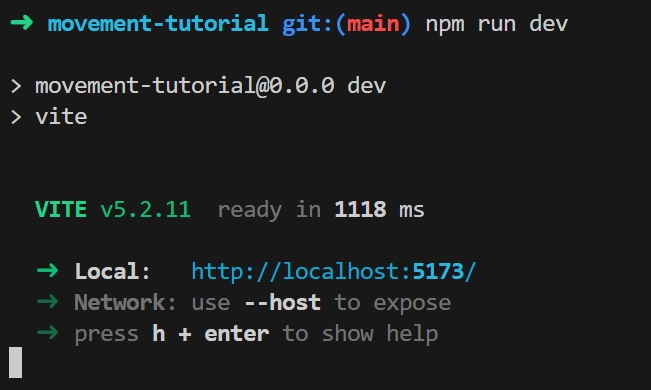
在terminal中運行以下命令來運行遊戲
這應該會給您一個連結,如 http://localhost:5173 。您可以在瀏覽器中打開該連結以查看遊戲。
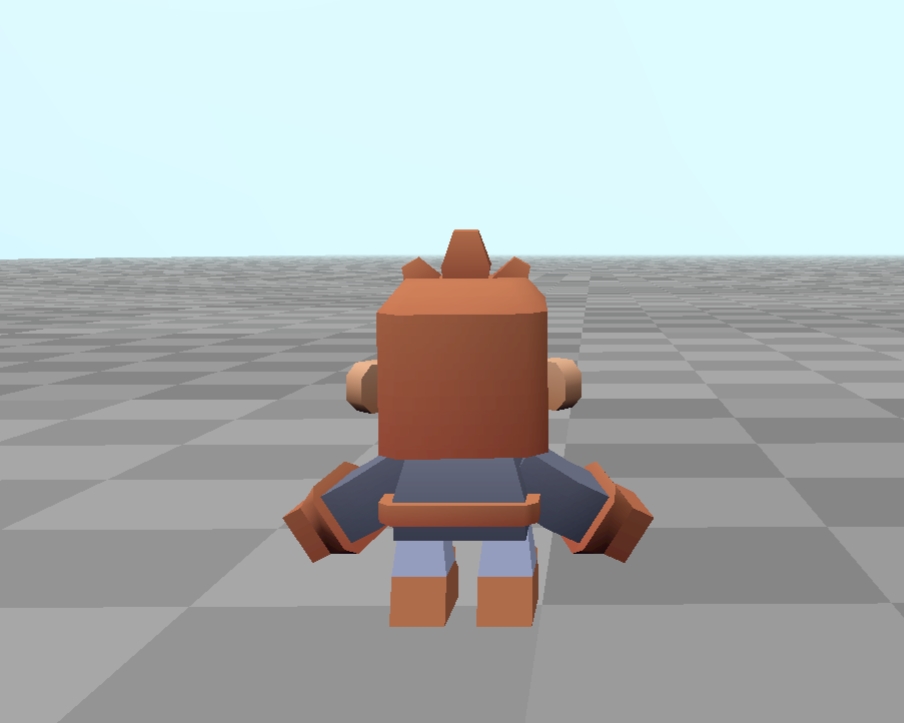
您現在應該看到遊戲運行,如教程開頭的圖片所示。嘗試按鍵盤上的W、A、S、D。首先用滑鼠單擊場景中的某個位置,以便通過移動滑鼠來旋轉角色和攝像機。
總結
您現在有了一個可能成為有趣遊戲的起點。
通過導入更多資產並將它們放置在場景中來設計更有趣的世界。
創建一個更有趣的遊戲。例如,添加一些遊戲機制 Trigger volumes ,可以在你走進去時觸發各種事物,或者放置其他角色,當你靠近並按下按鈕時會做一些事情。